Software Installation & Configuration
For this workshop we will be using software which has been pre-installed inside a “Virtual Machine” environment. We do this for two reasons: 1) making sure everyone has access to working software; and 2) preventing any foreseeable installation difficulties. More details on the ‘Why?’ are below, so first let’s answer the ‘What?’ question:
Download the VM from a permanent link at Zenodo
The Virtual Machine we are using for this workshop is uploaded to Zenodo and has a permanent DOI attached to it, so you can always download it in the future. Note that it is 4.5GB.
What is a Virtual Machine (VM)?
A Virtual Machine (or ‘VM’) is an operating system running as an application on your computer. Think of a VM as a little computer running inside your own computer. Just like you use Firefox or Google Chrome to run a web browser on your computer, you can use virtualization software to run a Linux VM on your computer or to run a Windows VM on your computer!
Here is a more detailed explaination of Virtual Machines.
Why use a Virtual Machine?
In a workshop environment there are two main advantages for using VMs:
- Heterogeneity of participant laptop configurations: Each workshop participant comes with their own laptop which is as unique to them as their own personality. Each laptop has a different operating system (OS), with different versions of different software already installed. Installing new software (such as we will need for this workshop) can involve accounting for and troubleshooting a LOT of unique laptop configurations, and this can consume precious time which we would otherwise be dedicating to the content of the workshop. By pre-installing all software inside a VM and sharing this with folks, we can transform a multi-dimensional software installation problem into a one-dimensional problem: installing the VM virtualization software. This saves lots of time and guarantees that everyone is working in an environment that will behave identically.
- Spotty/unreliable wifi connectivity: The other big problem VMs solve is the need for lots of stable bandwidth for software installation. The software we will use for this workshop requires downloading ~1GB of packages and data. Multiply this by 20 participants who are all doing this at once and it can strain even a strong internet connection to the point of collapse. By pre-installing everything in a VM and distributing the VM software and images to participants directly using USB drives we remove the need to rely on internet connectivity at all, guaranteeing we can run a successful workshop even with unstable/patchy internet access.
Getting set up with the RADCamp VM image
Now that you know more about VMs it’s time to get set up with the custom VM image we’ve developed for this workshop:
- Install the virtualization software for your OS: Virtualbox installers
- We’ll distribute a virtualbox image containing all software and data at the beginning of the workshop.
- Start virtualbox and choose File->Import appliance.
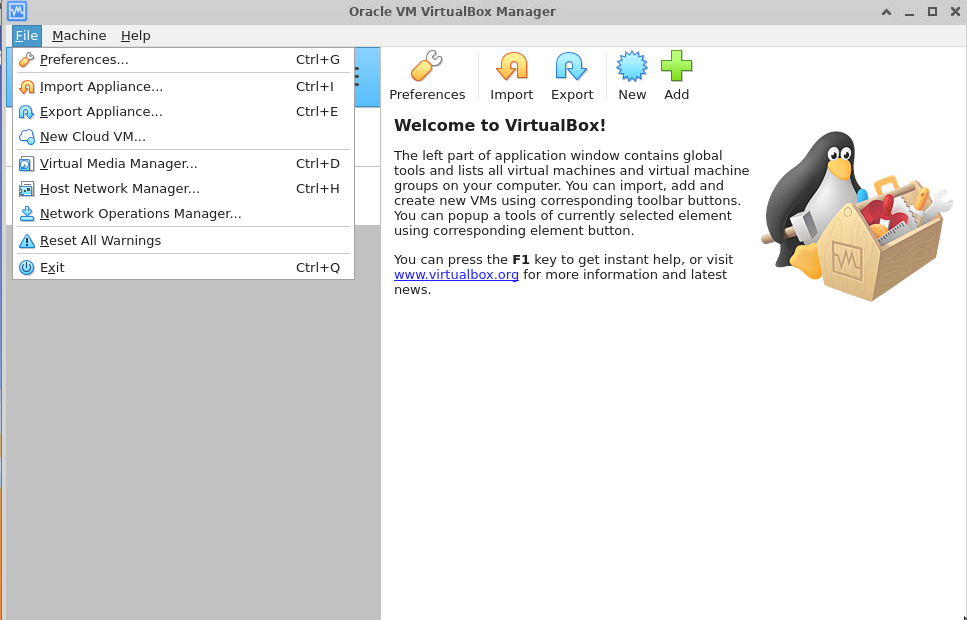
- Browse to the downloaded file, choose it and click ‘Import’
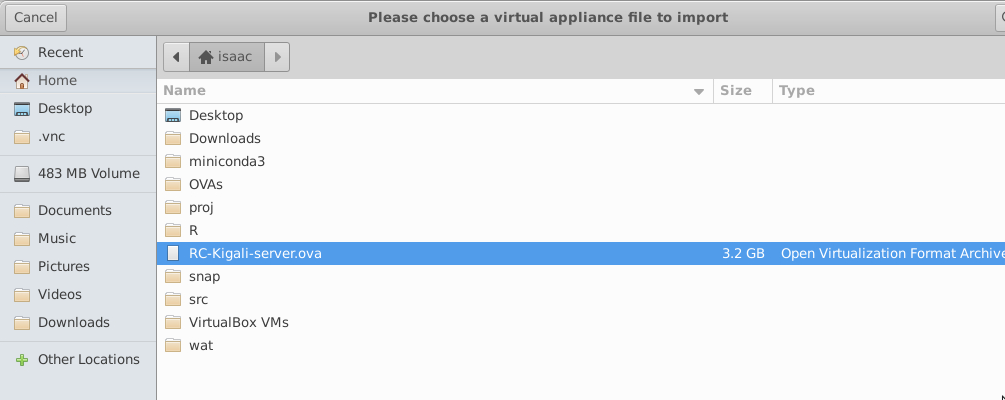
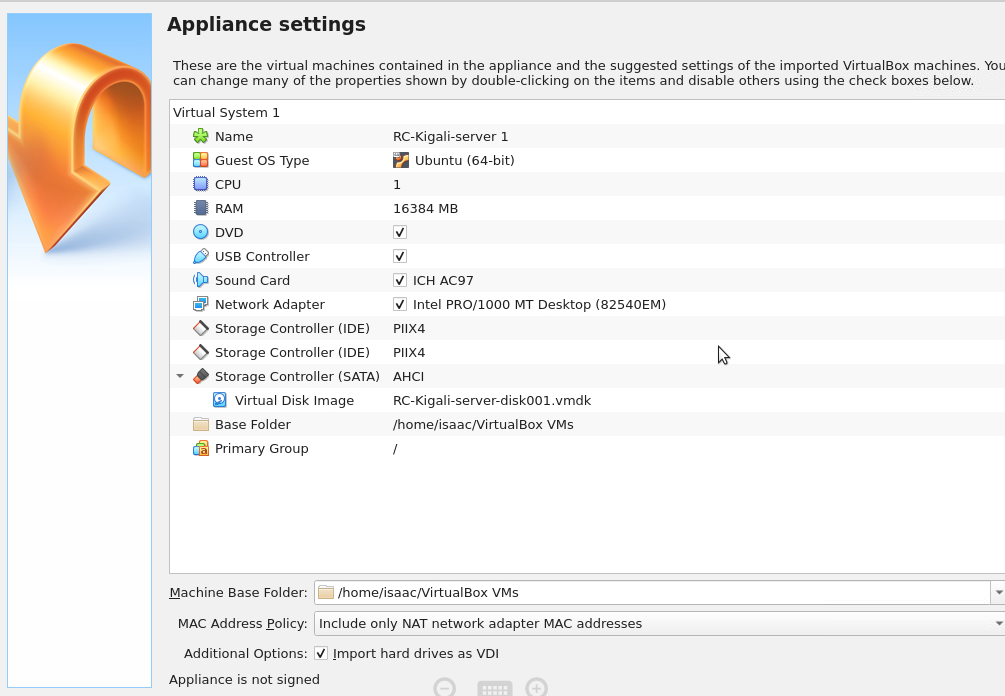
- RADCamp Virtualbox appliance settings will be displayed. Click ‘Next’ and ‘Finish’
to proceed.
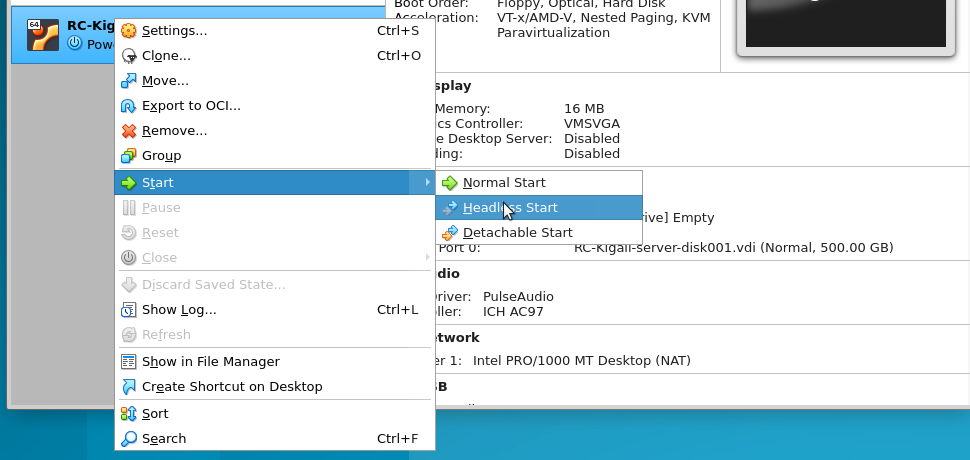
- The new image will appear in the left nav as
RC-Kigali-server. - Right click, choose ‘Start->Headless Start’ and wait for it to fire up. The
‘Headless Start’ will run the VM in the background, and since we will be accessing
the vm through a web browser we do not need to log into it directly.
- Open a web browser on your computer and navigate to
http://localhost:8800.- ONLY Mac M1/M2 users should use
http://192.168.64.8:8800
- ONLY Mac M1/M2 users should use
- This should present you with a Jupyter notebook environment running inside the VM with all necessary packages installed (for the ipyrad/RADcamp part of the workshop)
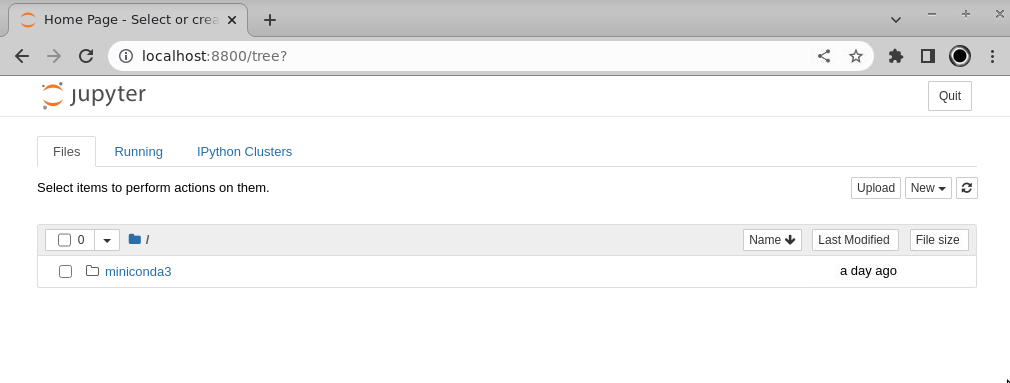
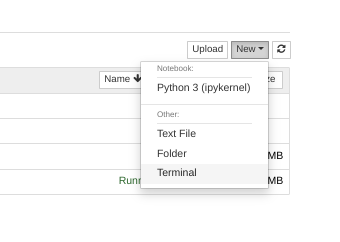
We will be running through the quality control and assembly of the cheetah data using the ipyrad CLI, so in your Jupyter notebook environment, create a new “Terminal” using the “New” button.
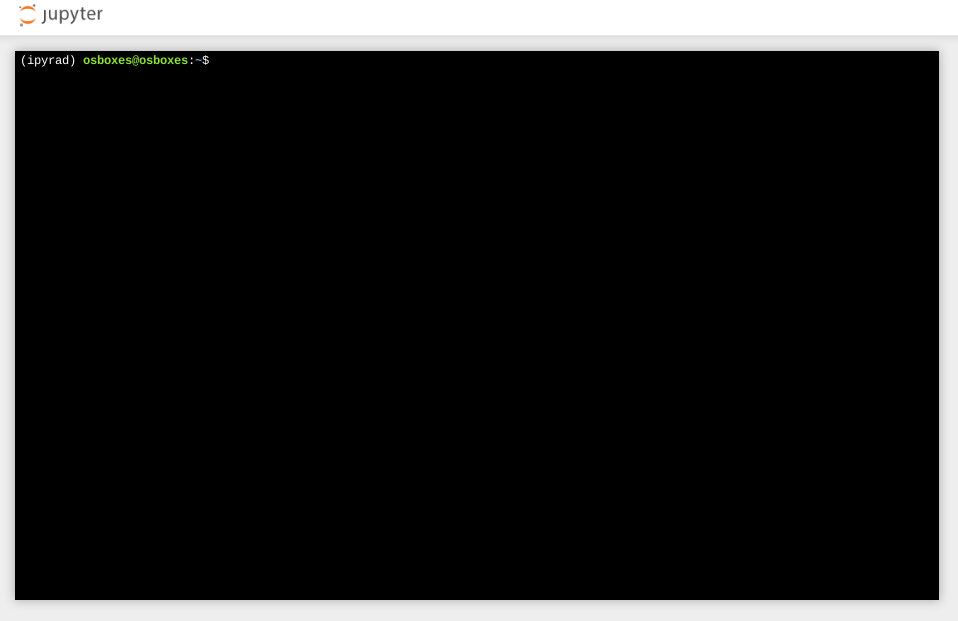
Which, after you open it will look like this:
Now, we’re ready to look at the data and start the analyses!
Advanced VM access (for the curious)
If you want to actually log in to the VM directly to mess with it yourself you can use ‘Start->Normal Start’ and then log in with this username/password.
Command Line Access to the VBox image: If you want to actually log into the VM the username/password are:
uname: osboxes
passwd: osboxes.org
If you are interested in how we set up this image, the techinal details are here: RADCamp VM technical setup